For “Shorty” 9 Bolt Adaptor
Caution ~ Watch for clearance.
Due to the “Shorty” adaptors length, it is imperative to maintain no more than ¾ inch overhang with shift lever when it is pulled toward driver. Please verify clearance before installing this adaptor. Also note the same for turn signal lever. Turn signal lever may have to be straightened or flipped over for clearance of fingers between wheel & lever. The “Shorty” adaptor will not work with column shift straight column or any column with “S” style shift lever. You may also be required to change the shift lever for final installation. We do not recommend bending lever! The chrome will crack, and because this lever is hardened it could break.
Instructions:
- Remove your old steering wheel and horn assembly.
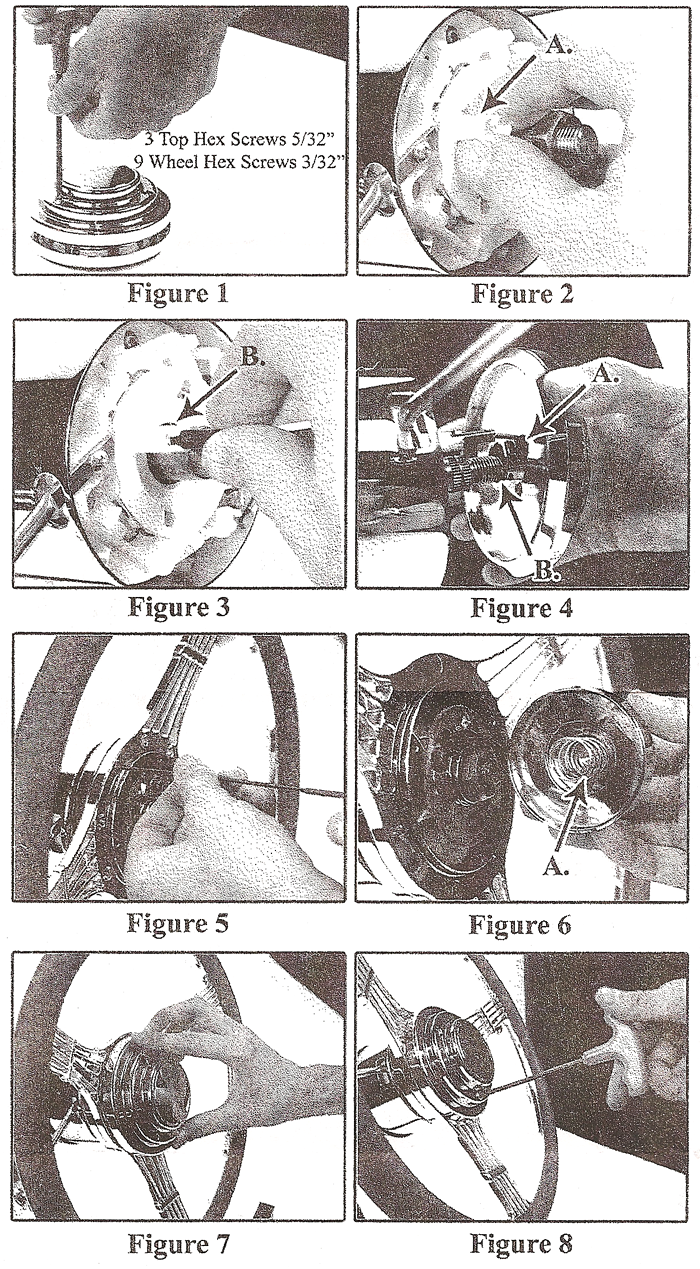
- Disassemble the “Shorty’ Adaptor. (Figure 1)
- Remove the dust cover (if equipped). If the dust cover is steel remove the 3 screws. If the dust cover is plastic, pry it off. Discard the cover it will not be required.
- Install the bottom piece of the adaptor by sliding it onto the splined shaft protruding from the steering column. With the road wheels pointed straight ahead make sure the horn cam is at 10:30 as on the face of a clock. Replace the nut and tighten. (Figure 2A)
- Install the horn wire. The horn wire fits through the adaptor into the horn cam. Turn and lock the plastic piece 1/8th of a turn clockwise. (Figure 3A)
- Slide the bottom piece of the adaptor onto the splined shaft protruding from steering column. (Figure 4B). When you do this the horn cam and horn wire should go through the horn wire hole on the adaptor (Figure 4A). Replace the nut and tighten.
- Wheel thickness may vary from one wheel manufacturer to another. Included with your adaptor are two sets of screws (short and long). We strongly recommend using the longer screws first, if they reach the bottom of the hole before securing the wheel to the adaptor then the shorter screws should be used.
- Install the steering wheel and the 9 bolts that hold the wheel on. Remember to have the steering wheel straight. (Figure 5)
- Insert the spring into the backside of the horn button and slide it over the center shaft of the column. (Figure 6A)
- Install the top piece of the adaptor by sliding it over the horn button and aligning the 3 holes. (Figure 7). Install the 3 screws and you’re finished!!!! (Figure 8)

