INSTRUCTIONS
RS-500 / RS-510
STEP: READ THESE INSTRUCTIONS CAREFULLY!
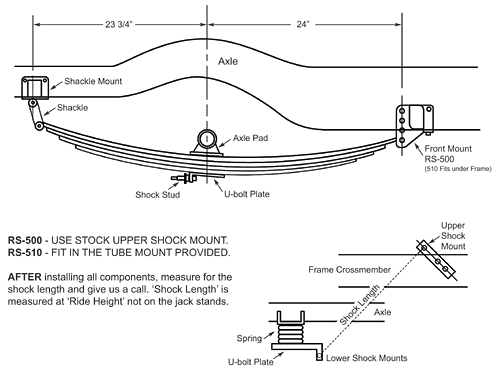
1. Remove all stock rear suspension.
2. Locate the axle (center line) – You may want to mock up the bed, fenders, and tires for this. The stock axle is not really in the middle of the fender. Take your time on this. Measuring is much easier if you set the truck level all the way around.
3. Measure 24” in front of the axle on each frame rail. Check these marks with a standard point on the frame – Such as cab mounts, or front suspension mounts. Balance your frame marks with these check measurements.
4. Line up the front spring mounts so that the “spring eye mounting holes’ are centered in the mark at 24”. Drill out the holes to 3/8” in the frame and bolt them on.
5. Measure from your front marks on the frame back 47 3/4” and mark the frame. Again, use a standard location and check the location. Line up th shackle mounts centering the bushings on the rear mark, drill and bolt in.
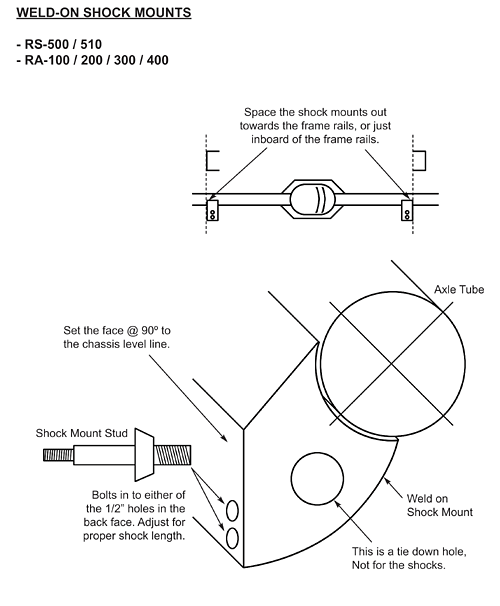
6. Assemble the springs, shackles, and rear axle. Mock up the shocks to the lower mounts. Trim the upper mount tube to fit into the frame. Mock up the upper mounts to the shocks and position the tube square in the frame and weld.
7. Set the pinion angle and weld the axle pads to the housing.
TORQUE:
U-bolts 65 ft/lbs
Spring Mounts 50 ft/lbs
Shackle Mounts 50 ft/lbs
Front Spring Bolts 45 ft/lbs
Rear Shackles 25 ft/lbs
Shock Mounts 25 ft/lbs


