WARNING: Installation of any component or kit should only be performed by someone experienced in the installation and proper operation of brake systems. It is also the responsibility of the person installing any brake component or kit to determine the suitability of the component or kit for that particular application.
NOTE: Before operating the vehicle after installation test the function of the brakes under controlled conditions. Make several stops in a safe area from low speed and gradually work up to normal speeds. DO NOT DRIVE WITH UNTESTED BRAKES! Always utilize safety restraints when operating the vehicle.
- The installation of the booster may require some minor cutting and drilling of the frame rail.
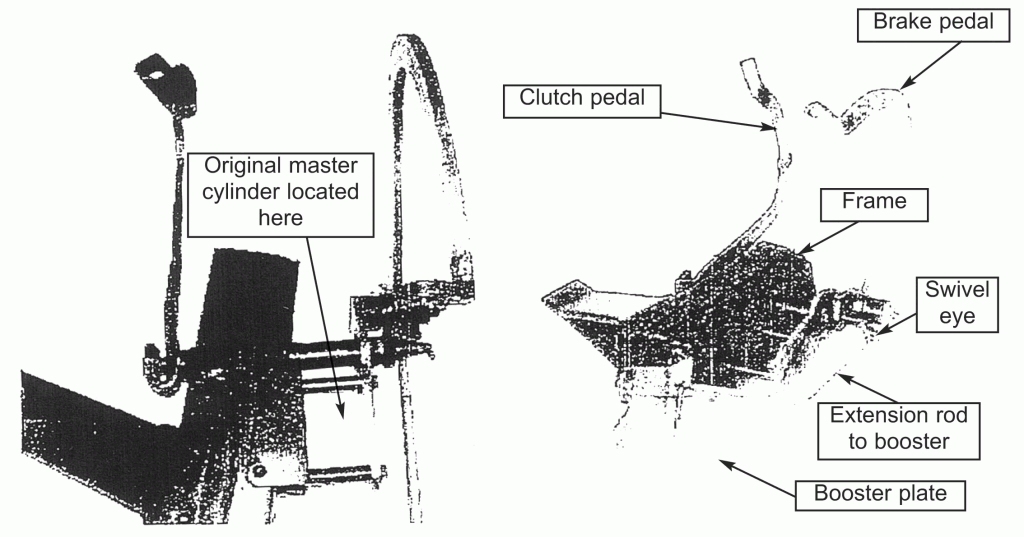
- Remove all the original master cylinder and pedal components from the frame.
- Clamp the new booster mounting plate (2 above) to the frame rail just behind the crossmember, directly up against the crossmember.
- Drill 3/8 holes through the inner side rail using the new mount plate as a pattern. With a long drill bit, using the inner frame holes as a guide drill holes through the outer rail. Open up the outer holes for socket clearance (usually about 1) needed for access to tighten the nuts on the mounting bolts. Bolt mount solidly to the rail.
- Bolt the booster to the booster mounting plate and secure tightly.
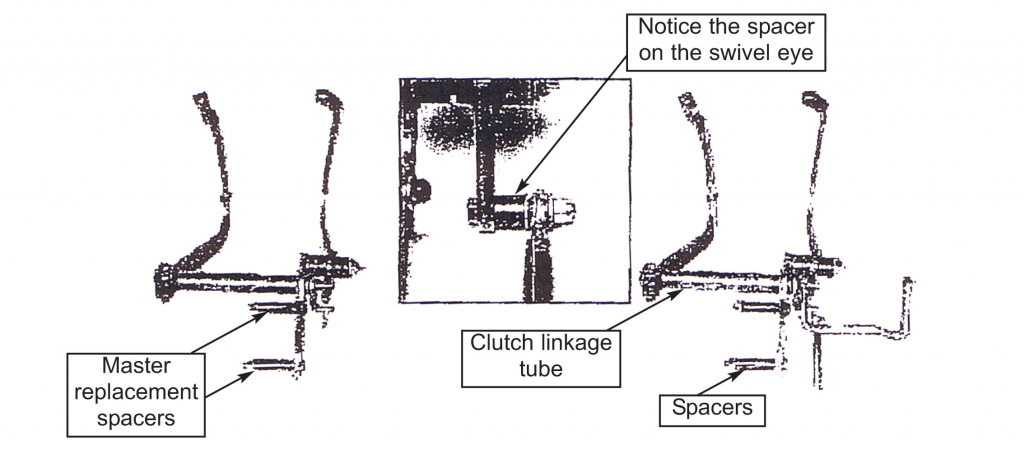
- Place the spacers between the new brake pedal plate and frame bolt to the frame where the old master cylinder was located. These spacers put the pedal in the original location once the master is removed.
- Mount the clutch assembly as shown below.
- Run the clutch linkage through the new pedal bracket, through the frame and attach to clutch pedal.
- Bench bleed the new master cylinder to remove all air. Secure master to booster.
- Supply the booster with 18 or more of vacuum from either the intake manifold or carburetor. Re-attach lines to the master as needed and bleed entire system.
- Test brakes before driving.
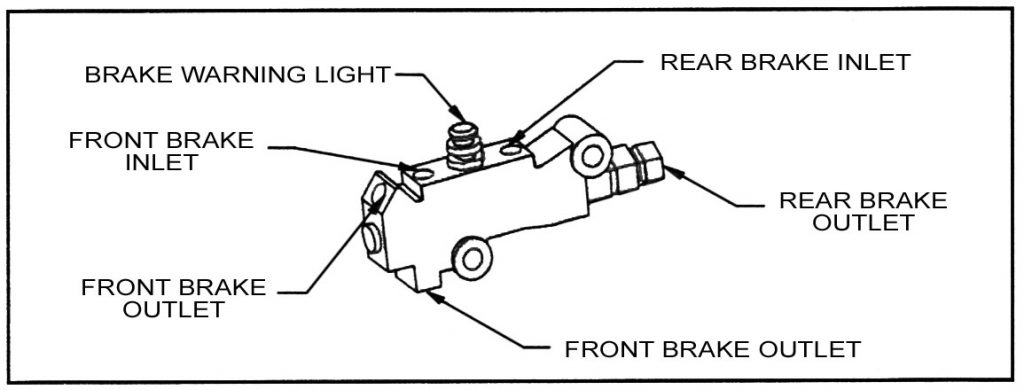
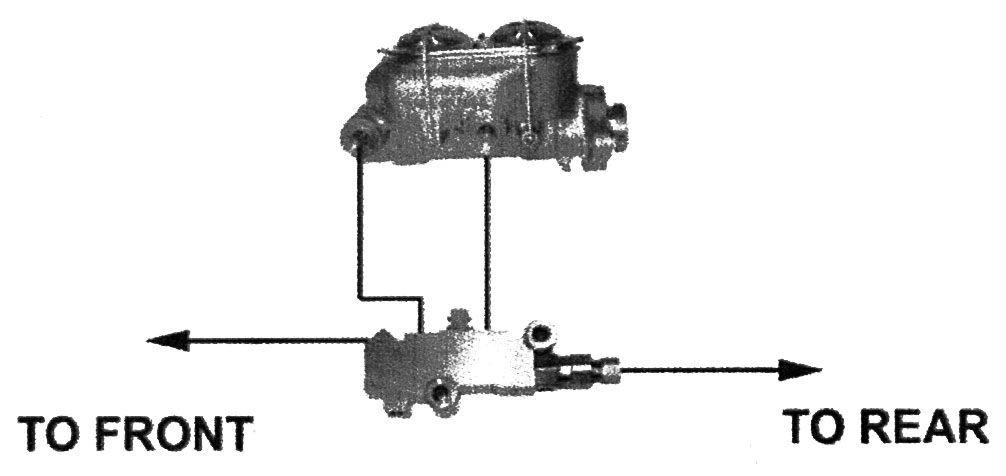
- If you have disc brakes front and drum rear we recommend the use of a combination valve (PV2 or 4) to properly balance the system. See below for master cylinder and valve plumbing.
How to bench bleed:
- Remove the master from the booster and place in a vice. (Be sure to clamp onto the mounting ear and not the cylinder.)
- Install the proper size plugs in the outlet ports of the master.
- Fill the master cylinder to the full line with brake fluid.
- Use a rounded end rod or a phillips head screw driver and push the piston in repeatedly until no bubbles are visible.
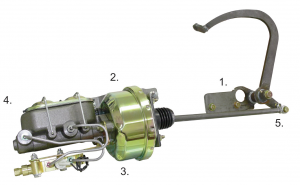
INCLUDED COMPONENTS: Your power brake conversion kit will contain the following components.
- Bolt on bracket and pedal
- Booster mounting plate
- 7” power booster
- Dual outlet master cylinder
- Swivel eye and rod from pedal to booster
- Bleeder kit (not shown)
- Spacers and bolts to hold the new pedal off the
- frame replacing the old master cylinder. (not shown)
