How many times have you bought car or truck and told yourself, “I’m just going to leave this one as is and drive it?” So you do drive it for a couple weeks, maybe a month, and then something needs to be repaired or replaced. Well, that little fix, it gets you to thinking, “Man, she would sure look good with a new set of wheels or even sitting a little lower to the ground!” So, the curse of not being able to leave well enough alone–or better yet, leaving something “stock”–has hit you and there’s nothing that can be done but to satisfy those temptations.
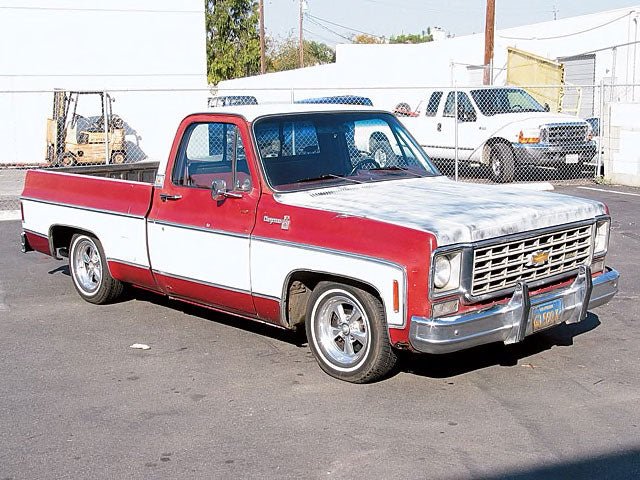
This curse was the case with this particular ’75 Chevy Cheyenne. Purchased with the sole intent of being just a “work truck,” it soon became a daily driver. Well, daily drivers need to be up to par mechanically, and the old workhorse, albeit previously owned by a so-called garage, was in dire need of brakes, bushings, and some not-so-minor engine work (flat cam among other things–but that’s another story for another day). Talks lead us to Jim Chaddick at Performance Online, a company coming on strong in the early-truck market. While Jim was in the process of developing his own line for the ’73-85 Chevys/GMCs, he wasn’t quite ready to debut it. So we suggested just using his replacement drilled/vented disc brake and suspension rebuild kits featuring Raybestos and Spicer products for the time being. He agreed, and we left the truck with his trusty crew.
Now that we gave you the “advanced-level” part of our ’75 Chevy lowering/suspension rebuild. From hub to hub, Performance Online not only completely went through the pickup’s front suspension–replacing pretty much every imaginable part with Spicer/Raybestos components–but also added a 4-inch Belltech drop kit (spindles and coils). Being that the Cheyenne was at stock height before all of this even started, you’d be correct to assume that we had to address the rearend sooner or later…well, now is later!
Unlike the frontend’s complexities, lowering the rearend was quite the opposite. Save for a little cutting on the frame for the Belltech “bolt-in” notch plates, bringing the back down was a snap. Basically what you’re doing is taking the stock leaf pack (you can buy new lowered leaf springs, but in a moment you’ll see why it’s not always recommended) and relocating it “below” the rearend itself. The Belltech spring plates not only replace the stock perches, but they act as lowering blocks, as well. Also, the new Nitro shocks bolt right where the stock ones went. How simple is that? Real simple. Now, being that we chose the 6-inch drop for the rear, having the additional lowered aspects of a dropped spring would have produced what some like to refer as a “speed-boat” stance (the rear being a bit lower than the front). If you chose less of a drop, say a 2-inch or even a 4-inch, then by all means, incorporating new leaf springs to make up the difference is not a bad idea (we were fine with the stock ones). If you prefer more of a “California rake,” you’ll probably not want to go as low out back… We’ve got some future frontend modifications in mind, so the 4-6 was fine for us!
Source: Classic Trucks | Posted: 02.2009